How to Make a Sundial in Your Yard - Printable activity sheet for kids

 How did people tell time before clocks and watches were invented? They looked to the sky!

Long before modern clocks, people used the Sun and shadows to keep track of the time. In this simple outdoor science activity, you can make your very own sundial using just a stick, a few rocks, and a sunny day.

It's a fun way to learn about the movement of the Sun, shadows, Earth's rotation, and ancient timekeeping. Even better, you can watch your sundial change throughout the day and make predictions about where the shadow will appear next.

How to Make a Sundial in Your Yard - Printable activity sheet for kids


What You'll Need

You don't need any special science equipment for this experiment.

Materials

  • ☀️ A sunny day
  • A flat, open area outdoors
  • A straight stick
  • Several small rocks
  • A clock or watch

That's it! The Sun does most of the work.

How to Make Your Sundial

Step 1: Find a Sunny Spot

Choose a flat, open area where the Sun will shine for several hours.

Make sure there aren't too many trees, buildings, or other objects that will block the sunlight and cover your sundial with shade.

Step 2: Place the Stick

Push the stick firmly into the ground.

Try to make it stand as straight up and down as possible. This stick will act as the main part of your sundial. The shadow it creates will help you track the time.

Step 3: Mark the First Shadow

Look at your clock and write down the current time.

Now look at the shadow made by the stick. Place a small rock at the tip of the shadow to mark its position.

You can also draw a line from the base of the stick to the rock.

This is your first time marker.

Step 4: Watch the Shadow Move

Now comes the fun part!

Return to your sundial every hour and check the shadow.

Each time you visit, place another rock at the tip of the shadow and write down the time.

Try predicting where the shadow will be before you check!

Will it be longer or shorter? Will it move to the left or the right?

Step 5: Create Your Time Markers

After several hours, you'll have a collection of rocks showing where the shadow appeared at different times.

Connect each mark to the base of the stick with a line. Write the corresponding time next to each mark.

Congratulations — you've made a sundial!

How Does a Sundial Work?

You might be wondering: Why does the shadow move if the stick isn't moving?

The answer has to do with Earth's rotation.

As Earth rotates, the Sun appears to move across the sky during the day. Because the Sun's position changes, the shadow cast by the stick also changes its direction and length.

In the morning, the shadow is usually quite long. As the Sun climbs higher in the sky, the shadow becomes shorter. Later in the afternoon, the shadow becomes longer again as the Sun appears to move toward the horizon.

The shadow can therefore act like the hand of a clock.

Can You Predict the Shadow?

Turn your sundial into a prediction game!

Before checking your sundial, ask:

  • Where will the shadow be in one hour?
  • Will the shadow be longer or shorter?
  • Which direction will it move?
  • When will the shadow be shortest?
  • What do you think will happen tomorrow?

Write down your predictions and then check whether you were right.

Try This Experiment Again

A sundial can teach you even more if you observe it on different days.

Try making observations:

  • In the morning
  • Around midday
  • In the afternoon
  • On different days of the week
  • During different seasons

Keep a shadow journal and record the time, the length of the shadow, and where it appears.

You can even measure the shadow with a ruler and make a simple graph showing how its length changes during the day.

A Fun Historical Connection

People have been using shadows to understand and measure time for thousands of years. Ancient civilizations developed different types of sundials to track the movement of the Sun.

By making your own sundial, you're using the same basic idea: watch the Sun, observe the shadow, and use what you see to measure time.

A Quick Tip About Noon

Around solar noon, the Sun reaches its highest point in the sky for that location, so the stick's shadow is generally at or near its shortest length for the day.

However, solar noon isn't always exactly 12:00 on your clock. Your clock time can differ because of your location, time zones, and daylight-saving time.

So don't worry if your sundial doesn't perfectly match your watch. The goal of this experiment is to observe the pattern and understand why the shadow changes.

What Did You Discover?

A simple stick and a few rocks can turn your backyard into a science laboratory!

By making a sundial, you've explored astronomy, timekeeping, shadows, and Earth's rotation — all with materials you can find around your home.

Next time you see a shadow moving across the ground, stop and think:

What time could it be? And where will the shadow be next?

Egg Drop Challenge: Can You Save the Egg? - fun activities for kids and grown ups

 Can you build a contraption that keeps an egg from cracking when it falls from a height? There’s only one way to find out!

The Egg Drop Challenge is a fun STEM activity that combines science, creativity, and engineering. Kids get to design, build, test, and improve their own egg-protection system while learning about important scientific ideas such as gravity, force, motion, and impact.

Egg Drop Challenge: Can You Save the Egg

The best part? There is no single “right” design. Kids can experiment with different materials and see what happens when their creations are put to the test.

It’s also a fantastic group activity. Invite a few friends or classmates and turn it into an exciting egg-drop competition!


What You'll Need

You don't need fancy laboratory equipment for this experiment. Gather some everyday materials and let the kids decide how they want to use them.

Materials

  • 🥚 Eggs — have a few extras ready!
  • Tape
  • Scissors
  • Bubble wrap
  • Balloons
  • Cardboard
  • Drinking straws
  • Sponge
  • Cotton balls
  • Rubber bands

Tip: You don't have to use every material. In fact, using fewer materials can make the challenge even more interesting!

How to Do the Egg Drop Challenge

Step 1: Plan Your Design

Before touching the materials, ask the kids to think about their design.

How will you protect the egg?

Will you surround it with soft materials? Build a box around it? Create a frame with straws? Use balloons as cushions?

Encourage kids to draw a quick sketch of their idea before they start building. This is the first step of the engineering process: plan before you build.

Step 2: Build Your Egg Protector

Place the egg in the center of your chosen materials and start building your protective structure.

Make sure the egg is protected from different directions. You can use tape and rubber bands to hold everything together.

Try to leave enough space between the egg and the outside of your structure. That extra space can help absorb some of the force when the egg hits the ground.

Step 3: Check Your Creation

Before the big test, give your egg protector a careful inspection.

Is the egg secure?

Can it move around too much?

Are there any parts that might fall off?

Trim any extra cardboard, tape, or other materials with scissors. Always have an adult help with scissors when needed.

Step 4: Choose a Safe Drop Zone

Now comes the exciting part!

Find a suitable place for your experiment. An outdoor area is usually best. Choose a clear space away from people, pets, windows, cars, and anything that could be damaged.

Have an adult help choose the drop height and supervise the experiment.

Hold your egg protector above the chosen spot and...

3... 2... 1... DROP!

Step 5: Check the Egg

Carefully pick up your creation and open it.

Did the egg survive?

If it cracked, don't worry! A failed test is actually a very useful part of the engineering process.

Ask:

  • What worked well?
  • Where did the egg crack?
  • Which materials helped protect it?
  • Was the egg too close to the outside?
  • Could the structure be stronger or softer?
  • What would you change next time?

Then make a new design and try again!

What's the Science Behind the Egg Drop?

So, what's actually happening when the egg falls?

Gravity Pulls the Egg Down

When you let go of the egg, gravity pulls it toward the ground. The longer it falls, the faster it moves.

The Egg Experiences an Impact

When the egg hits the ground, its motion changes very quickly. That sudden change creates a large force, which can crack the fragile shell.

Your job is to design a structure that helps reduce the effect of that impact.

Materials Can Absorb the Impact

Soft and flexible materials such as sponges, bubble wrap, and cotton balls can cushion the egg.

Other materials, such as cardboard, straws, and rubber bands, can be used to create a structure that keeps the egg away from the ground and spreads the force around the egg.

Some designs can also slow the egg down before it reaches the ground.

That's engineering in action!

Become an Egg-Drop Engineer

Want to make the challenge even more exciting?

Try changing one thing at a time and see whether it makes a difference.

For example:

  • Drop the egg from different heights.
  • Try using only three materials.
  • Give everyone the same materials.
  • Test two completely different designs.
  • Add a parachute to slow the fall.
  • Give each team a limited amount of tape.
  • Keep track of which designs survive the most drops.

You can even create an egg-drop scorecard and record your results.

How many types of international cuisine are there?

There is no definitive number of types of international cuisine, as it can be challenging to categorize and define cuisines strictly. Culinary traditions and flavors vary greatly from one country to another, and within countries, there can be significant regional variations. Moreover, globalization and cultural exchange have led to the emergence of fusion cuisines that blend elements from different culinary traditions.


That being said, international cuisine can be broadly classified into various categories based on geographical regions or cultural influences. Some common categories include:

Asian Cuisine

This includes Chinese, Japanese, Thai, Korean, Indian, Vietnamese, Malaysian, Indonesian, and many other Asian cuisines.

European Cuisine

This encompasses cuisines from countries like Italian, French, Spanish, Greek, German, British, Scandinavian, Russian, and others.

Middle Eastern Cuisine

This includes cuisines from countries like Lebanese, Turkish, Persian, Israeli, Moroccan, and others.

Latin American Cuisine

This includes cuisines from countries like Mexican, Brazilian, Argentinian, Peruvian, Colombian, and others.

African Cuisine

This includes cuisines from various regions of Africa, such as Ethiopian, Moroccan, South African, Nigerian, and others.

North American Cuisine

This includes the cuisines of the United States and Canada, as well as Indigenous and regional cuisines within these countries.

Oceanic Cuisine

This encompasses the cuisines of Australia, New Zealand, and the Pacific Islands, such as Hawaiian, Polynesian, and Maori cuisines.

These are just general categories, and within each category, there are numerous subcategories and regional variations. Additionally, there are also fusion cuisines that combine elements from different culinary traditions. The diversity of international cuisine is vast and continually evolving as culinary traditions interact and adapt to new influences.

"Top" cuisines - What are the Top 10 International Cuisine

The concept of "top" cuisines can be subjective and may vary depending on personal preferences and cultural contexts. However, here are ten popular international cuisines that are widely recognized and celebrated:

Italian Cuisine: Known for its pasta, pizza, risotto, gelato, and a variety of flavorful sauces and cheeses.

Italian Cuisine - pizza
Italian Cuisine

Image by zuzana gazdikova from Pixabay

What does International Cuisine Mean

International cuisine refers to the diverse range of culinary traditions, dishes, and flavors from around the world. It encompasses the foods and cooking styles associated with different countries and regions, reflecting their cultural, historical, and geographical influences. 

International cuisine celebrates the unique ingredients, spices, techniques, and presentation styles used in various cultures.

Macedonian Cuisine
Macedonian Cuisine Photo source...

With globalization and increased travel, international cuisine has become more accessible and popular in many parts of the world. It includes a wide variety of culinary traditions, such as Italian, French, Chinese, Japanese, Thai, Indian, Mexican, Greek, Middle Eastern, and many others. Each cuisine has its own distinctive ingredients, cooking methods, and flavor profiles that are deeply rooted in the traditions and customs of the respective cultures.

International cuisine offers a rich tapestry of flavors, textures, and aromas, allowing people to explore and appreciate the diverse culinary heritage of different countries. It often involves the use of local and traditional ingredients, as well as regional cooking techniques, which contribute to the uniqueness and authenticity of each cuisine. International cuisine has greatly influenced and enriched culinary practices worldwide, leading to fusion cuisines and the blending of flavors from different parts of the globe.

Traditional methods of food preservation - How to Preserve Food at home

All food products, on exposure to air, undergo certain changes which unfit them for use as food. It was once thought that these changes were due to oxidation, but they are now known to be caused by minute living organisms present in the air, in the water, in the ground, and in the food itself.

To preserve food two things are necessary; first, to either kill or render harmless those organisms already present; and second, to exclude others from entering.

The first we usually accomplish by cooking, and the second by sealing.

How to test the purity of honey at home

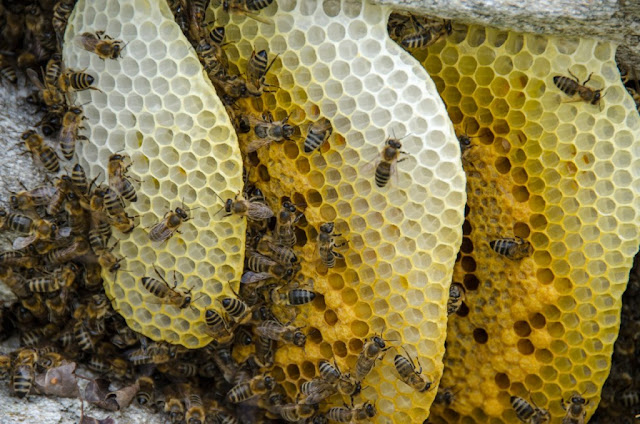
Honey producers should list all the ingredients the honey contains. If the honey is not pure natural, it should be written on the label, including the percentage of real honey, if any. However, there are many frauds, so here are 10 tricks that can help you determine if the honey is pure natural honey.

How to test the purity of honey at home

Photos: Apiary101.com...

1. Rub a little honey between the forefinger and thumb until it falls apart. Some honey may be absorbed into the skin, which is good since pure honey is good for the skin. Natural honey is not sticky. If what you rub is sticky, then it has sugar or artificial sweeteners in it.

2. Place a few drops of honey on a paper or paper towel. Pure honey will not get through the paper for a long time..

3 Mix a little honey with egg yolk. If the honey is pure, when you whisk the egg yolk, it will seem like it's cooked.

4 Fill a glass with water and add 1 tablespoon of honey. Pure honey will coagulate and drop to the bottom. Fake honey will begin to melt.

5 Spread honey on a slice of bread. Natural honey will harden the bread in a few minutes. Artificial honey will moisten the bread because of the water content.

6 Real honey will give you a stinging sensation in the mouth just before swallowing. Fake honey can’t achieve this.

7 Look at whether the honey will crystallize over time. Imitation honey will stay as smooth as syrup, no matter how long it stood.

8 Dip in honey top of a match and try to ignite. Fake honey contains water so that a match can’t ignite.

9 Put in the microwave two to three tablespoons of honey. Preheat over high heat. Natural honey will soon caramelize and does not become foamy. Fake honey will be difficult to caramelize and will be full of bubbles.


Why do the leaves of the trees change color in autumn?

As we know, in autumn the leaves of the trees turn red and yellow and later fall off.  But do we know why this is happening? 

Basically, plants only grow when there is sunlight, which appears as white light, but is made up of rainbow colors. In summer, the leaves of most plants are green due to the high levels of sunlight. They have the dye chlorophyll, which reflects the green part of the sunlight, which is why the leaves appear green. The other parts of the sunlight are absorbed, ie "swallowed" by the plant and used to convert light into starch (photosynthesis). In addition to chlorophyll, there are other color pigments, namely carotenes (orange), anthocyanins (red), or xanthophylls (yellow). In summer, however, these are usually completely covered by the green chlorophyll.

Forest road with yellow and orange trees

In autumn the solar radiation is weaker, the days become shorter, and the temperatures are lower. As a result, the rate of photosynthesis also reduces. The yellow, red, and orange components of the light are not consumed, and less chlorophyll is needed and thus less is produced. As a result, less green light is reflected, instead, the red, yellow, and orange light components are now also reflected.

Since the plants now carry out less photosynthesis, they pull the nutrients out of the leaves in order to store them in the trunk, branches, and roots as reserve materials. After the leaves have served as places of energy production over the summer and all nutrients have been removed, only some of the yellow-red coloring matter remains. 

In this way, the tree prepares itself for winter rest, since the leaves fall off as protection against evaporation.


Forest with yellow leaves

Why Leaves Fall from Trees in Autumn?

Deciduous plants lose their leaves to protect themselves. There are many factors that make it difficult for plants to retain their foliage and photosynthesize in winter. One reason is the ground frost: Because of it, no water can be absorbed from the earth into the roots. If a tree were to keep its leaves in winter, they would allow a lot of water to evaporate. However, no new water could be absorbed by the plant from the frozen ground. 

In addition, pausing life processes in winter is a good way to save energy. The effectiveness of photosynthesis is greatly reduced in the cold - so the tree could hardly gain the energy for all the complex measures for frost protection. 

A bare tree also has the advantage that it can withstand a possible snow load better. Hardly any snow remains on the thin branches and twigs, which makes them less likely to break off.

What is the purpose of leaf shedding?

The mechanism behind the leaf shedding is relatively simple and effective at the same time. A thin layer of cork forms at each leaf base. This serves as protection because it closes the ducts. This layer also protects against frost and pathogens. If the layer is completely formed, the leaf loses its connection to the branch and falls down with the slightest gust of wind. 

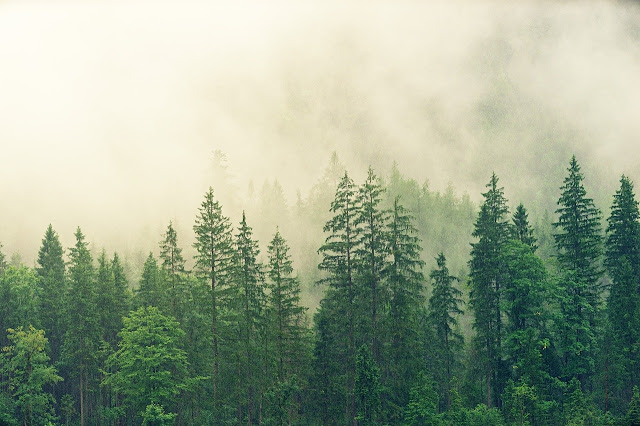
Forest with evergreen trees

How are evergreen trees able to keep their leaves?

Evergreen plants have leaves that are better protected against frost. Building such a stable foliage is time-consuming, which is why it is not worth shedding. The design of the leaves results in a lower photosynthesis output, but the plant can also use its leaves in winter if the conditions allow it for a short time.


Why did the Soviet Union collapse?

It can be said that the main reason for the collapse of the Soviet Union was the major economic problems, due to the high spending on the arms race.
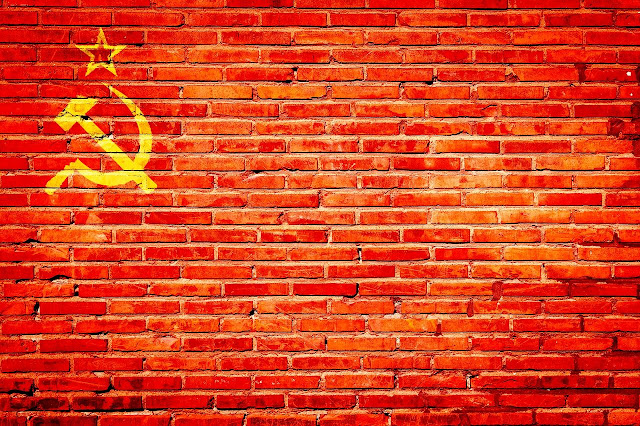
Soviet Union flag on brick wall

The centrally controlled economy threatened to collapse, and the member states of the Union of Soviet Republics (USSR) demanded more independence and demanded an opening to the West.

"Solidarność" union 

In the 1980s, protests against the economic situation and the dictatorship of the Communist Party increased in the states of the Eastern Bloc. 

In Poland, the Solidarność union (Polish for “solidarity” full name - Independent Self-Governing Trade Union "Solidarity") was formed at the Lenin Shipyard in Gdańsk, Poland. It was the first independent trade union in a Warsaw Pact country to be recognized by the state, and its leader was Lech Wałęsa, awarded with Nobel Peace Prize in 1983. 

Strajk sierpniowy w Stoczni Gdańskiej im. Lenina 22

Lech Wałęsa, August 1980

Solidarność was banned in 1981, but continued to exist underground and campaigned for social rights, democracy, and freedom of expression. It is widely recognized as having played a central role at the end of Communist rule in Poland.


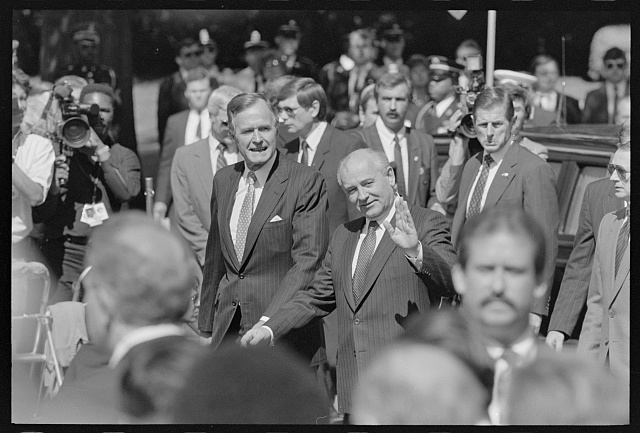
Soviet Union-United States summit arrival ceremony with President H.W. Bush and Mikhail Gorbachev, 31 May 1990

Mikhail Sergeyevich Gorbachev, (born March 2, 1931), Soviet official, general secretary of the Communist Party of the Soviet Union (CPSU) from 1985 to 1991, and president of the Soviet Union in 1990–91

With the election of Mikhail Sergeyevich Gorbachev as General Secretary of the Communist Party of the Soviet Union (CPSU) in 1985, the policy of the Soviet Union changed. He proclaimed a "new way of thinking" that would henceforth dominate Soviet foreign policy. Since April 1986, in several public speeches, he has granted every socialist country the freedom to "go its own way". This abandonment of the Brezhnev Doctrine is generally considered to be the beginning of the end of the Eastern Bloc. Gorbachev recognized the economic and political weaknesses of the communist system and tried to save it through reforms. The two most important were perestroika and glasnost.

Perestroika (Russian for “restructuring”) describes the economic and political change within the USSR towards more freedom and democracy. 

Perestroika program aimed to restructure Soviet economic and political policy. The communist central economy was loosened and elements of the free-market competition were allowed. The Soviet Union took up more economic ties with the West. In 1989 the first free elections were held in the Soviet Union.

Glasnost, (Russian for “openness”) was a Soviet policy of open discussion of political and social issues. 

The Soviet government tried to make political decisions more transparent and allowed its citizens more freedom of expression and freedom of the press.

In 1987, Mikhail Gorbachev and US President Ronald Reagan signed a treaty to disarm certain nuclear weapons. This was an important step in defusing the Cold War. In 1989 Gorbachev proclaimed freedom of religion for all Soviet citizens and granted the Eastern Bloc states more political independence.

In the Warsaw Pact states, the previously brutally suppressed protest movements were now gaining massive support, and at the end of 1989 the protests in the capitals and provinces of the Eastern bloc intensified to such an extent that the communist governments were overthrown everywhere. 

In October 1989 the Republic of Hungary was proclaimed.

Fall of the Berlin Wall

The fall of the Berlin Wall on 9 November 1989 was a pivotal event in world history that marked the fall of the Iron Curtain and the start of the fall of communism in Eastern and Central Europe. From September 1989, so-called Monday demonstrations took place in Leipzig and other East German cities, in which tens of thousands of people took part. 

Berlin Wall graffiti

In a peaceful revolution, the SED regime (Socialist Unity Party of Germany) was overthrown and a parliamentary democracy was established. On the night of November 10th, all border posts within Berlin were opened. Crowds climbed the wall and occupied it. In the days that followed, all border crossings in the GDR were opened for free travel. The demolition of the Berlin Wall began.

The end of the Eastern Bloc and the Soviet Union (USSR)

The opening of the Iron Curtain accelerated the collapse of the Eastern Bloc. In the states of the Eastern Bloc, political and economic upheavals took place, mostly in a peaceful manner. The states freed themselves from Soviet domination and oriented themselves towards Western models:

On November 17, 1989, only nine days after the fall of the Berlin Wall, students gathered in Prague, Czechoslovakia to protest against the communist regime. In the course of the so-called Velvet Revolution, which was largely peaceful, the Czechoslovak Federal Republic was founded in December 1989. 

In December 1989 the Republic of Poland was proclaimed. The first partially free parliamentary elections since 1945 had already been held in June.

In Bulgaria, the head of state and party leader Todor Zhivkov (Bulgarian: Тодор Живков) resigned on November 10, 1989, and Andrey Lukanov (Bulgarian: Андрей  Луканов won the elections on February 3, 1990.

In Romania, parliamentary democracy was established after a violent uprising against the communist regime. On December 21, the Romanian secret service "Securitate" attacked a mass demonstration in Bucharest and caused a bloodbath with estimated 689–1,290 dead. In the following days, the dictator Nicolae Ceaușescu was overthrown and after an unsuccessful attempt to escape. He and his wife Elena were shot dead on December 25th, 1989.

On October 3, 1990, the two German states were reunified. This day is celebrated today as the Day of German Unity. 

The political changes in the Eastern European states also had an impact on the Soviet Union. The republics of the Soviet Union also demanded their independence. After sometimes violent protests and the August coup in 1991 against the Soviet government, the USSR disintegrated into individual states. 

With the Soviet Union in 1991, the Council for Mutual Economic Aid (Economic alliance of the Eastern Bloc countries) and the Warsaw Pact (Military alliance of the Eastern Bloc countries) dissolved.

The last president of the Soviet Union, Mikhail Gorbachev resigned on Christmas Day 1991

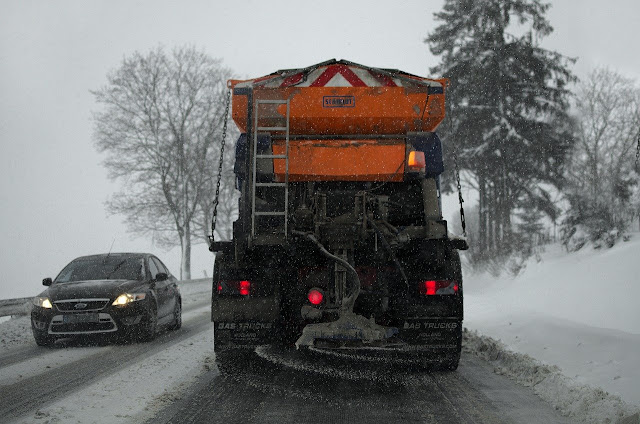
Why Is Salt Used to Melt Ice on the Roads in Winter?

We are used to seeing trucks dumping salt on the road during periods of extreme cold that we almost forget to wonder why.

Salt helps fight snow and ice, and so, to secure the roads. But how is this done?

When the temperature drops below 0° C, water in liquid form turns into a solid-state (ice). Same we observe when we put water in a freezer. The fundamental difference between liquid water and solid water (ice) is how individual water molecules organize themselves. 

Truck is placing salt on icy road

In liquid water, molecules (made up of two hydrogen atoms and one oxygen atom - H2O) are free to move relative to each other. 

When the temperature drops below 0 °, these movements slow down until they stop. The water molecules then bind together in a sufficiently durable manner, symmetrically, freezing in the form of ice, solid water.

If the cooling process is slow, magnificent ice crystals are created, as the bonds between individual molecules have time to form very symmetrically on a large scale.

Now let's analyze the kitchen salt (sodium chloride). When trucks put salt on icy roads, the salt molecules break down into their sodium and chloride ions, just like when you put kitchen salt in a glass of water. Due to their proximity, these ions locally disturb the arrangement of water molecules.

The process then propagates deep into the rest of the ice, and slowly, solid water turns into liquid and salty water. 

You might think that when the ice melts with the help of salt, the temperature rises above 0°, but actually, the contrary happens.

If pure, water freezes at 0°C, and changes from liquid to a solid-state. If water is impure, its melting point drops below 0°C. Depending on the nature of the impurities and their quantity, the melting point is different. The salt spread on the roads is capable of lowering the melting temperature of the water, depending on the amount that is added. The more salt is added, the more the melting point drops below zero.

But when temperatures drop very low, table salt is no longer effective enough to melt ice. Other salts can be used, but they are more aggressive for the environment.

To melt ice on the roads, cooking salt can be replaced by another type of salt (eg. calcium chloride or magnesium chloride); where the same dissolution process is observed. But the result is a little different since one molecule of calcium chloride or magnesium chloride produces two chloride ions for one calcium or magnesium ion. In this case, the presence of a greater number of ions makes it possible to accelerate the melting of the ice.